Sunday, August 29, 2021

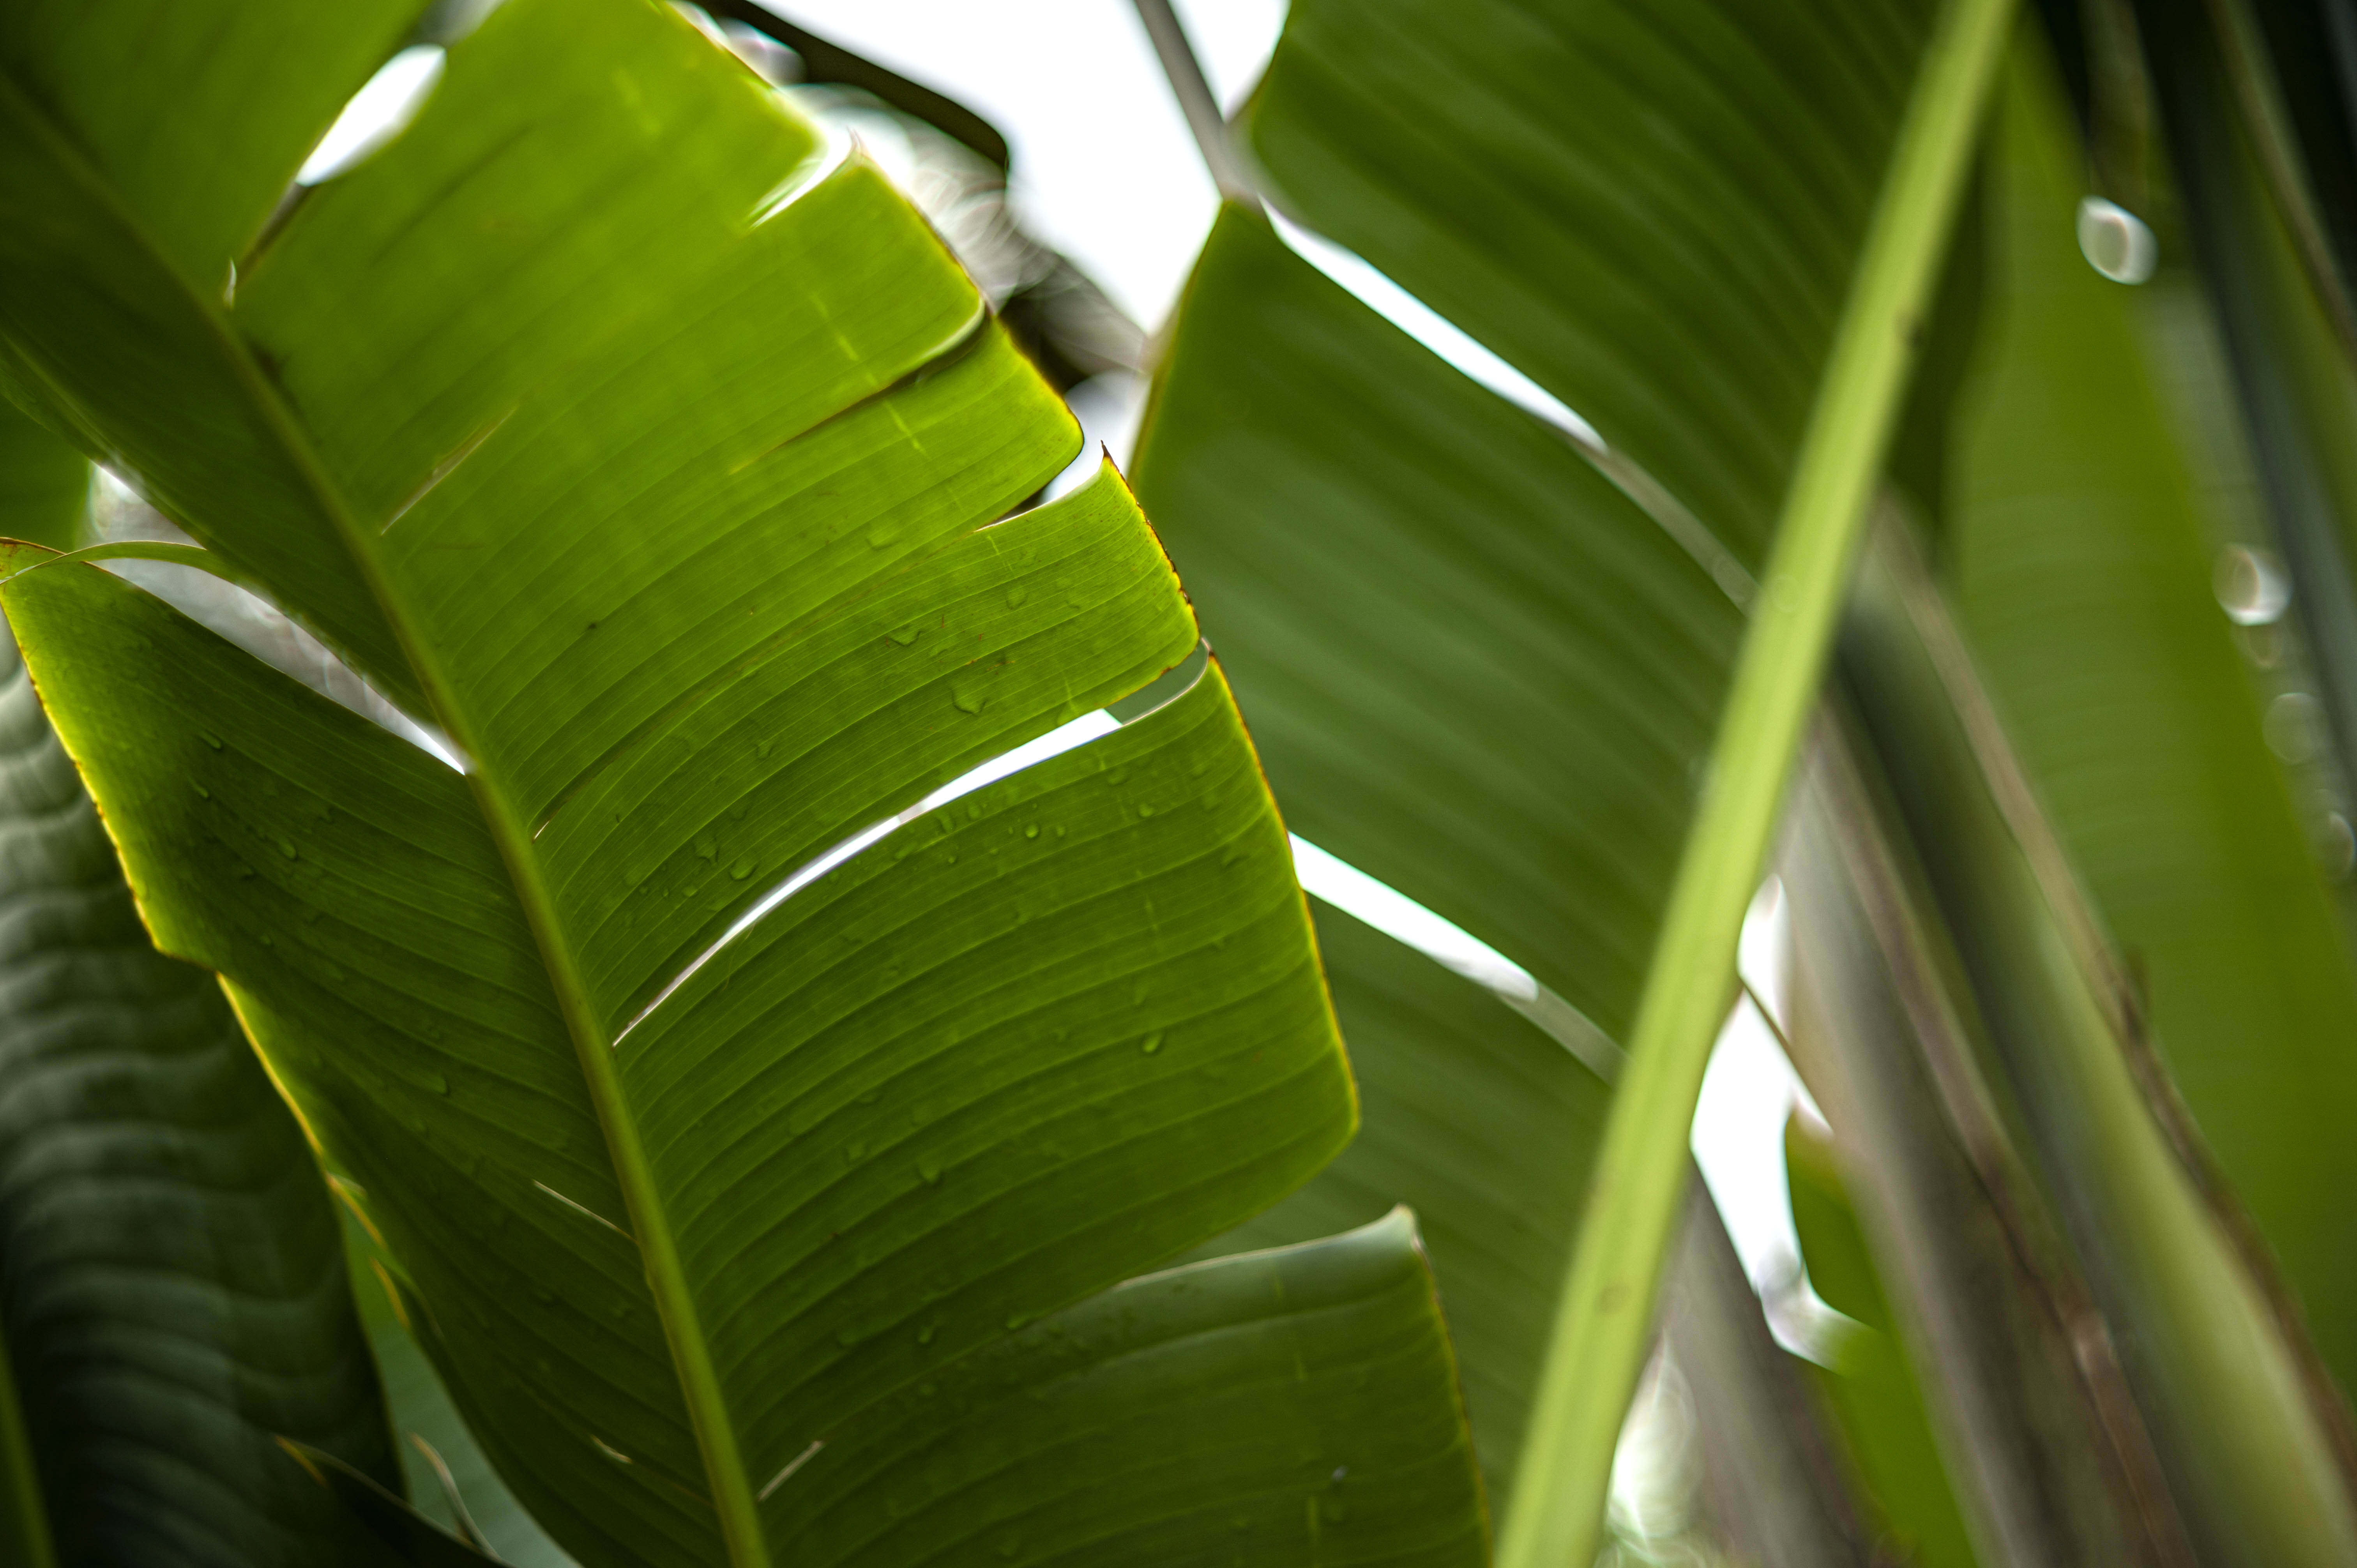
 It was late morning when we left the Van Gogh exhibit in Miami. The sun was straight overhead and pouring through some tall palm trees that were in front of the exhibit building. Inspired by Van Gogh's love and use of bright sunlight in his paintings, I tried to capture some of his “yellow sunlight” to recreate my experience in the exhibit.

I slowed the shutter speed down to 1/40 second and moved the camera back and forth to create some blurred lines with the palm fronds all the while allowing the blazing sun to wash out the central part of my frame. At this moment, it is hard for me to totally visualize what I expect to accomplish with my final image construction. So, I gather as many diverse variations of the scene as I can to provide me with the material I will need later to rearrange into an image that reflects what I was feeling at the moment.

The final image is below. I wanted it to reflect Van Gogh’s love of bright light and color from the south of France, while at the same time show how here in Florida, we are often faced with the same creative ingredients of nature.


The technique I invented to create these images is what I've been calling "photo-cubism". It is a method of first exploring the subject with a camera. It involves moving around and through a subject, capturing it from different perspectives, a way that is natural to many photographs exploring a subject. Later, I dissect the results and re-assemble the parts into a new whole that provides a more comprehensive interpretation of the subject over time. This is related to what the Cubist painters, Picasso, Braque, Cézanne, and others set out to do in the early 20th-century.

The image above is an assembly of parts from three separate photos of the same scene. The right and left sides are each a separate photo juxtaposed. Next, through a creative process, I call "cross-pollination", I take parts from one scene and incorporate them in various shapes on the other side of the composition in an effort to unite the colors and tie the whole piece together. This is the method I have used for most of what I have been doing in my "Odyssey" series for the past two years.

The camera used for this image was the Fuji X-Pro3 with the 18-55mm Fuji zoom lens, a combination I usually carry with me whenever I go out. The final image is 64" x 32" presented as a mounted aluminum dye-sublimation print. Combining several images side-by-side like this, I can achieve large prints without loss of image quality.


Monday, August 23, 2021

What I don't like about photographing with a cell phone

 At dinner last night I wanted to take a photograph typically done using a cell phone. I wanted to capture the label on a really nice bottle of wine. There were candles burning on the table and soft, overhead incandescent lighting -- perfect moody warm lighting for the scene. My first reaction was to pull out my Samsung phone and quickly snap a close-up shot of the bottle label, but the resulting photo totally lacked the ambiance of the scene. The phone camera totally destroyed the mood of the scene. Firstly, it over-corrected the colors of the warm lighting. Secondly, its wide-angle lens killed the soft bokeh of the background by bringing the surrounding area into focus. 

Wide-angle lenses are a necessity on cell phone cameras due to the tiny sensor size of their cameras. Some phones can actually to a fake soft-focus to compensate for this, but it never looks as good as the real thing.


The above photo was the result of the cell phone image. It totally lacked any of the ambiances of the real scene with colors insipidly over-corrected and an in-focus background driving attention away from the main subject, the label on the bottle of wine.


Fortunately, I was having dinner at home and could quickly go and pick one of my Nikon Z cameras with a 50mm lens on it. I left the lens aperture wide open to throw the background out of focus. I left the light completely uncorrected, which preserved the nice warm glow and highlights from the candles resulting in a moody image of the scene as I saw it.

Cell phone cameras definitely have a place in the world of photography. There are times when the detriments I mentioned above of color correction and overly extensive depth-of-field are exactly the features you need for a faithful rendering of a scene. But, when capturing mood is paramount, I prefer the advantages of a larger sensor and none of the built-in factory software compensations for a perceived false interpretation of the scene.

Both of these shots were quick grabs with no post-processing. After all, I wanted to keep it quick so I could get back to the real matter at hand, which was the enjoyment of a fabulous dinner my wife and I had prepared for ourselves.


Monday, August 2, 2021

Leica Summarex 8.5cm f/1.5 - an old dog with new tricks

The Leica Summarex 8.5cm f/1.5 lens was originally designed in 1936 by Max Berek but had a production run from 1943-1960. It is quite rare in that only 4066 silver and 276 black versions were made. The one shown below was manufactured in 1951. 

I just sold this lens on eBay and was intrigued by a question the buyer asked me about it. He wanted to know if the lens was up to the resolution status of a modern M10 Leica camera, which is how he planned to use it. My curiosity was piqued so I mounted it on a Nikon Z6 camera and took it outside for a test run. I have to admit to being extremely surprised at the high-quality images delivered by this vintage lens. It was sharp, even when used wide open at f/1.5. But the really pleasant surprise was the unique bokeh effect it displayed when used wide open.

The lens mount is solid metal and quite heavy with its 5 groups of 7 elements. The controls take a bit of getting used to because of the way the barrel turns as you focus it.

The optical design is made up of one major hunk of glass!


You will need two adapters to mount the screw-mount Summarex lens onto a Nikon Z-camera. On the left is the Fotasy Leica-to-Nikon-Z adapter, and on the right is a Leica screw mount to Leica M bayonet mount. This Fotasy Leica-to-Nikon mount only accepts a Leica bayonet mount lens.

This is how I normally imagine a Summarex lens -- mounted on something like a Leica IIIG camera with an 8.5cm viewfinder accessory and Leicavit rapid advance base.

Below are some of the test images I did with the Summarex mounted on a Nikon Z6 camera body. All images were taken with an aperture value between wide open at f/1.5 and stopped down to only f/2 or f/2.8. Note, too, that there is no vignetting in these pictures. 


The colors, contrast, and sharpness achieved by the Summarex, even at very open apertures are quite amazing for a lens of its age. We have to keep in mind also that it has none of the very sophisticated coatings of a modern-day lens. Click here to download a high-res file of this image.


This image -- shot at f/1.5 -- shows the beautiful bokeh effect in the out-of-focus areas behind the foreground palm leaf. Click here to download a high-res file of this image.

One of the chief advantages of using an older lens like this Summarex is that it can deliver a softness in the out-of-focus areas that is very appealing in a very different way from the bokeh of more modern coated lenses. The Summarex was introduced in 1943 as an uncoated lens, which accounts for some of suffused, glowing light in the softer areas of the photographs. 


Thursday, August 20, 2020

Still Life Passages

For many years I have been photographing foliage, not in its springtime glory, but in its process of decay, or what I call "passage". This series of still life images records objects passing from one life form to another, as they succumb to the laws of nature and the passage of time. I have tried to capture the sculptural beauty resulting from this process. 

In this current series of photos I added other objects to the compositional mix with the folliage, objects that share a similar fate of being reformed by nature during the passage of time. This transformation may take the form of rust, decay, color fade, or the complete morphing into another form.

Taken with a Nikon Z7 and 60mm Nikkor macro lens at f/22. Lighting was with a single Godox AD200 Pro flash through an umbrella. I added a dark, textured background surface of rusted metal to each shot instead of keeping them on a dead black. 


Tuesday, July 14, 2020

If Turner had a camera

The English painter, William Turner, was known for the intensely colorful way he painted his sunsets and sunrises, as in the painting below. Whenever I encounter an extremely colorful sunset or sunrise, I always think of him.  This time I was photographing the sky in normal daylight when I encountered what I term a "Turner effect". 


I was out photographing the sun peaking through a heavy sky full of cumulus clouds. I was using a Nikon Z6 with the latest 24-200 mm f/4-6.3 zoom lens because it could cover such a broad focal length that allowed me to form the scene into multiple compositions by going from extremely wide to telephoto.

As I began photographing directly into the sun, which was shining brightly from behind a thin area of the clouds, I noticed that the edges of the image took on a kaleidoscope of colors. The color effect only lasted for a short time, just long enough for me to grab a few images. I was using a shutter speed of 1/8000 and an aperture that varied from f/11 to f/22 to capture the two images below.


While the colors were there in the original, RAW file, I did enhance them somewhat and also adjusted the exposure in post by lightening up the shadows and bringing down the highlights.  For shots, like these, where I want the colors to really pop, I convert the image to the LAB color profile in Photoshop and increase the color intensity there before re-converting it back to RGB. LAB has a far more extensive color range in which to work.


Thursday, July 9, 2020

Concepts of solar energy

This week I decided to turn my creative photo attention to solar energy - an important enough topic and one that is constantly in the news.  So, I picked up a solar panel and went at it. While I did take some specific shots of just the panel, for the most part, I've been stocking up on simple images of the panel that I can use to construct more complex images in Photoshop. Below are a few of my first efforts. There will be many more to come.

I used both the Fuji X-T4 and Nikon Z6 to take the photos of the panel. Both cameras had standard zoom lenses on them so I could change the focal length quickly to obtain different perspectives on the panel.

All the suns were added from the collection of "Sunshine Overlays"  I created for MCP Actions .


Recent solar technology is now working to also garner energy from solar panels at night. To illustrate this concept I added a background shot I took of the Milky Way to a photo I made of a solar panel array and created the above photo.


Sunday, July 5, 2020

The day after the 4th of July

A nice thing about the day after the 4th of July is getting to rework some of the firework photos from the night before. This year I incorporated a shadow silhouette of a palm tree to tie the fireworks display to Florida. And, as always, I will make some other patriotic images by combining the fireworks with other images I have collected over the years, such as the shot of the Liberty Bell below.

All the photos were taken using a Nikon Z6 and the new Nikkor 24-200 zoom lens.  The fireworks were very bright so I had to shoot them at f/11, but I also had to leave the shutter open for around 25 seconds to capture the silhouette of the palm tree against the dark sky.